This tutorial is widely inspired from an article written by unixorn: https://unixorn.github.io/post/in_the_beginning_there_was_bare_metal/-
The quick way to install kubernetes is to use the following script :
https://github.com/unixorn/blog-scripts/blob/master/arm-k8s/borg-odroid
Install DietPi
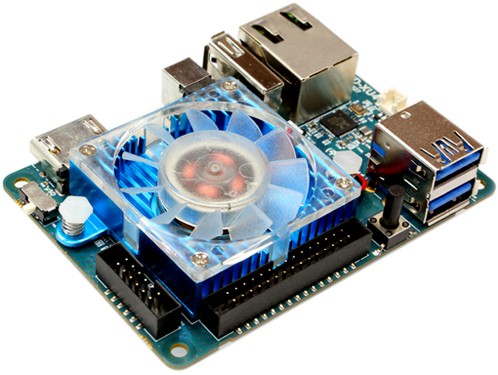
DietPi is a well built distribution for Odroid XU4. I use a cloudshell enclosure for my XU4 and diet pi provides optimized software especially designed for the cloudshell (front panel lcd screen script, but also a wide set of tools to make file-server, download unit, webserver, ad-blocker like pi-hole and so on).
You can find how to install it here: https://dietpi.com/docs/user-guide_install/#how-to-install-dietpi
Change your root password!
During DietPi installation, the installer will ask you to change root password. It is highly recommanded to change it from default.
Install your updates
apt-get update && apt-get upgrade && apt-get dist-upgrade
Install useful tooling
Let’s also add some useful tools to the machine.
apt-get install -y dnsutils git htop lshw man net-tools rsync sudo python3-setuptools gcc libc-dev apt-transport-https ca-certificates curl gnupg2 software-properties-common python3-pip
Now we’re ready to install Docker and Kubernetes.
Partition & Format the drive
Install pre-requisites
Check what’s on your drive with lshw -C disk For the sake of these examples, we’ll assume the SATA drive is /dev/sda
Format the drive
If you didn’t add a SATA drive to your Odroid, you can skip this section.
First partition it
- fdisk /dev/sda
- list all the existing partitions with the p command
- Remove any existing partitions with the d command
- Create a new partition with the n command
- Write the new partition table to disk with the w command
Now format it
mkfs.ext4 /dev/sda1
Configure the system to automatically mount the drive
Get the UUID with
blkid | grep /dev/sda.
You’ll see something like
/dev/sda1: UUID="abcdabcd-abcd-11bb-9343-9089b93bbb72" TYPE="ext4" PARTUUID="13371337-abcd-1234-aa00-abcd1234abcd1234"
Create a mount point to mount your filesystem. I picked /mnt/sata and created it with mkdir -p /mnt/sata
Add an entry to /etc/fstab. Use your editor of choice to add a line UUID="abcdabcd-abcd-11bb-9343-9089b93bbb72"
/mnt/sata ext4 defaults 0 2.
Use the UUID from step 1, not the example one here.
You should now be able to mount the drive with mount /mnt/sata. If it succesfully mounts, it should show up after a reboot.
Force a static IP for the node
First, back up the current network config with cp /etc/network/interfaces /etc/network/interfaces-original Now edit /etc/network/interfaces and put in:
# Ethernet adapter 0
auto eth0
allow-hotplug eth0
#no-auto-down eth0
iface eth0 inet static
address 192.168.1.100
netmask 255.255.255.0
gateway 192.168.1.1
dns-nameservers 8.8.8.8 8.8.4.4
# Or use your own by uncommenting below
# dns-nameservers 192.168.1.1
You may have to adapt address, netmask and gateway accordingly to your local network.
Disable swap
Kubernetes doesn’t like swap, so disable it with swapoff -a. Remove swap entry from /etc/fstab by commenting lines making refrence to swap:
#/var/swap none swap sw 0 0

Another method to disable swap:

swapoff -a
Install Docker and Kubernetes
Docker
Install the docker apt signing GPG key
curl -fsSL https://download.docker.com/linux/debian/gpg | apt-key add - echo "deb [arch=armhf] https://download.docker.com/linux/debian $(lsb_release -cs) stable" > /etc/apt/sources.list.d/docker.list
Install pip & docker-compose
pip3 install wheel setuptools docker-compose
Install docker
apt-get install -y docker-ce --no-install-recommends
Confirm Docker is working
docker run hello-world You should see something similar to this: root@rodan:~# docker run hello-world
Unable to find image 'hello-world:latest' locally
latest: Pulling from library/hello-world
c1eda109e4da: Pull complete
Digest: sha256:2557e3c07ed1e38f26e389462d03ed943586f744621577a99efb77324b0fe535
Status: Downloaded newer image for hello-world:latest

Hello from Docker!
This message shows that your installation appears to be working correctly.

To generate this message, Docker took the following steps:
 1. The Docker client contacted the Docker daemon.
 2. The Docker daemon pulled the "hello-world" image from the Docker Hub.
    (arm32v7)
 3. The Docker daemon created a new container from that image which runs the
    executable that produces the output you are currently reading.
 4. The Docker daemon streamed that output to the Docker client, which sent it
    to your terminal.

To try something more ambitious, you can run an Ubuntu container with:
 $ docker run -it ubuntu bash

Share images, automate workflows, and more with a free Docker ID:
 https://hub.docker.com/

For more examples and ideas, visit:
 https://docs.docker.com/get-started/
Install Kubernetes
Install the k8s repository key
curl -s https://packages.cloud.google.com/apt/doc/apt-key.gpg | apt-key add -
Add the k8s apt repository
curl -s https://packages.cloud.google.com/apt/doc/apt-key.gpg | apt-key add -
add k8s apt repository
echo "deb https://apt.kubernetes.io/ kubernetes-xenial main" > /etc/apt/sources.list.d/kubernees.list
Install Kubernetes
apt-get update
apt-get install -y kubelet kubeadm kubectl
apt-mark hold kubelet kubeadm kubectl
Uptodate at https://kubernetes.io/docs/setup/independent/
Initialize the cluster on your master node
By default, Flannel requires we use 10.244.0.0/16 for our CIDR when initializing the cluster, because the flannel configuration we’re going to install later expects that CIDR - sure, we could change all the references to it, but that is just going to give us chances to break it.
kubeadm init --pod-network-cidr=10.244.0.0/16
You should get following output:
Your Kubernetes control-plane has initialized successfully!
To start using your cluster, you need to run the following as a regular user:
mkdir -p $HOME/.kube
sudo cp -i /etc/kubernetes/admin.conf $HOME/.kube/config
sudo chown $(id -u):$(id -g) $HOME/.kube/config
You should now deploy a pod network to the cluster.
Run "kubectl apply -f [podnetwork].yaml" with one of the options listed at:
https://kubernetes.io/docs/concepts/cluster-administration/addons/
Then you can join any number of worker nodes by running the following on each as root:
kubeadm join : --token
--discovery-token-ca-cert-hash sha256:
Configure kubectl
mkdir -p $HOME/.kube
&& sudo cp -i /etc/kubernetes/admin.conf $HOME/.kube/config && sudo chown $(id -u):$(id -g) $HOME/.kube/config
Set up Networking
At this step the cluster state should be NotReady. To be able to work properly kubernetes needs a piece of software that can manage all the networking stuff. This is the role of the Network Fabric.
We will use Flannel for this purpose, but first:
You need to set /proc/sys/net/bridge/bridge-nf-call-iptables to 1 by running sysctl net.bridge.bridge-nf-call-iptables=1 to pass bridged IPv4 traffic to iptables’ chains.
Install Flannel
To install flannel:
https://github.com/coreos/flannel
kubectl apply -f https://raw.githubusercontent.com/coreos/flannel/master/Documentation/kube-flannel.ymlAt this step, you can check your running pods
kubectl get pods --all-namespacesStart with master node only
When you install your first kubernetes nodes, the easiest way is to start with a single master node and start deploying pods on it.
By default kubernetes will reserve the master node as the entry point to the cluster and then will not allow pods to run on it, you can change this behavior with the following commande:
kubectl taint nodes --all node-role.kubernetes.io/master-Conclusion
This article presented a step by step tutorial on how to setup a kubernetes master node in order to start playing with kubernetes on a single board computer such as the Odroid XU4.
The next steps are to :
- install kubernetes-dashboard
- install ingress and metal-lb in order to access the dashboard from outiside the cluster
Sources:
https://unixorn.github.io/post/in_the_beginning_there_was_bare_metal/